

Are you considering hair extensions but feeling overwhelmed by the options and process? This guide will walk you through choosing the right extensions, budgeting for your new look, and maintaining your investment. We’ll cover different types of extensions, including remy hair extension clips, and help you select the perfect match for your hairstyle and brown hair. You’ll learn about installation, care, and safe removal techniques, ensuring your extensions look great and last longer. By the end, you’ll be equipped to make informed decisions about your hair extension journey, from selecting the right type to understanding sale prices and keratin treatments.
Key Takeaways
- Choose extensions that match your hair type, texture, and color for a natural look
- Professional installation and removal are recommended for most semi-permanent extension types
- Proper maintenance, including gentle brushing and using specialized products, extends the life of extensions
- Give your natural hair breaks between extension applications to maintain its health and strength
- Regular follow-up appointments with your stylist ensure optimal care and longevity of your extensions
Understanding Different Types of Hair Extensions
Explore the world of hair extensions, from synthetic to human hair options like Bellami extensions. Discover clip-in, tape-in, and sew-in methods, comparing temporary and permanent solutions. Learn to select the right color, texture, and type for your desired image. We’ll guide you through the pros and cons of each option, ensuring excellent customer service in your chestnut-hued hair journey.
Synthetic vs. Human Hair Options
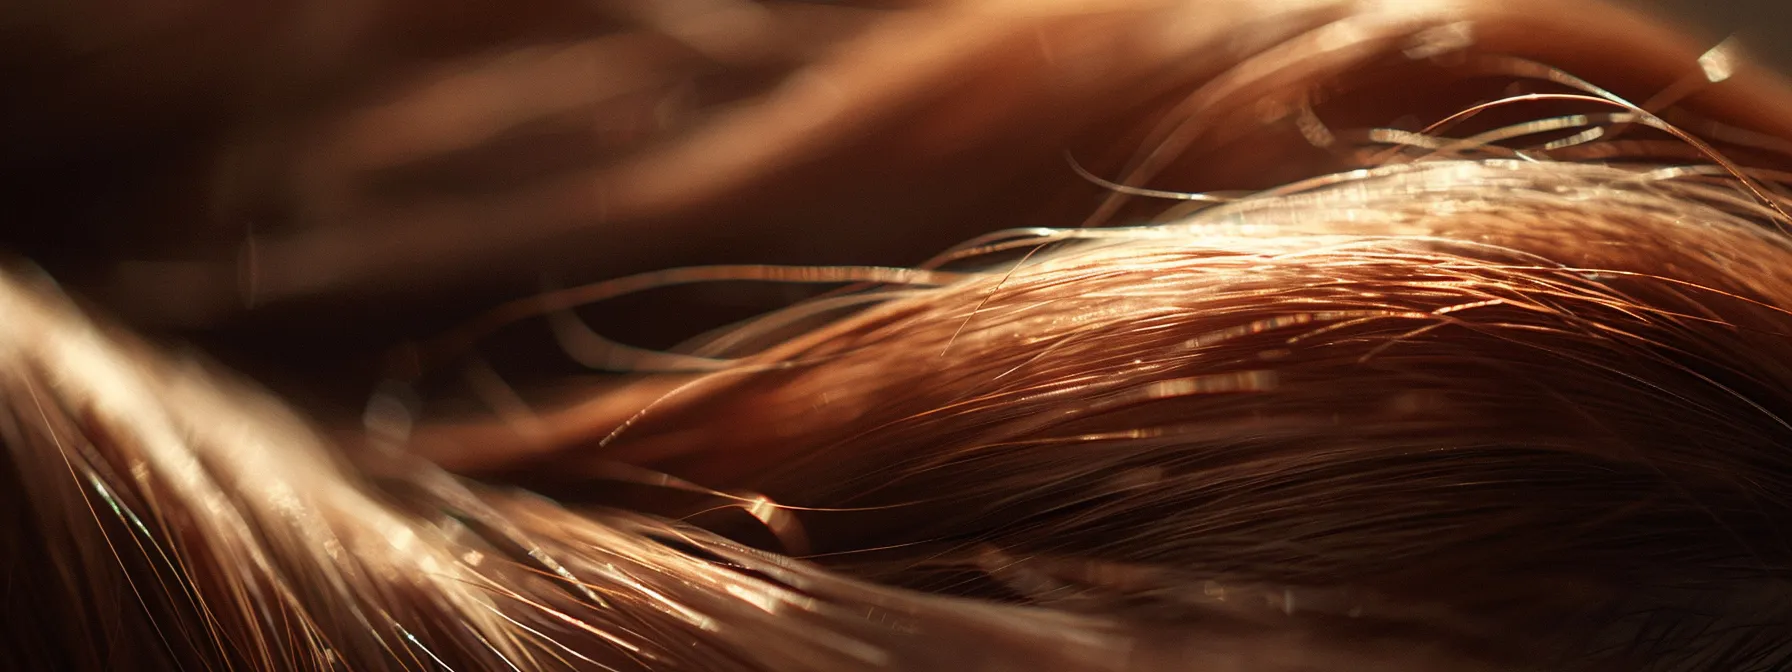
When choosing hair extensions, you’ll encounter two main categories: synthetic and human hair. Synthetic extensions offer affordability and come in a wide range of colors, from natural brown to platinum blonde. However, they lack the natural look and feel of human hair, and can’t be heat-styled or colored.
Human hair extensions, including remy hair, provide a more natural appearance and versatility. You can style, cut, and color these extensions just like your own hair. Whether you’re aiming for a caramel balayage or rich chestnut hue, human hair extensions blend seamlessly with your natural locks, offering a flawless finish.
While human hair extensions are pricier, they last longer and offer superior quality. You’ll find they maintain their shine and texture even after multiple washes, unlike synthetic options. For a long-term investment in your appearance, human hair extensions, particularly remy hair, are the go-to choice for many clients seeking a natural, high-quality look.
Clip-In, Tape-In, and Sew-in Methods
Clip-in extensions offer a quick and easy solution for adding volume and length to your hair. You can attach these wefts to your root area using small clips, allowing for versatile styling options, including high ponytails. Clip-ins are perfect for temporary transformations and can be easily removed at the end of the day.
Tape-in extensions provide a semi-permanent option that lasts 6-8 weeks. These extensions are attached using a special tape or adhesive near the root, creating a natural look. Tape-ins are ideal for those seeking a more long-term solution without the commitment of sew-in methods. They’re also great for creating custom looks, as they can be easily blended with your natural hair.
Sew-in extensions, also known as weaves, offer a long-lasting option for those wanting significant length or volume. This method involves braiding your natural hair and sewing wefts onto the braids. While more time-consuming to install, sew-ins can last up to 3 months with proper care. Some sew-in extensions even feature silicone-lined wefts for added comfort and protection of your natural hair.
Temporary Versus Permanent Solutions
Temporary hair extensions offer accessibility and flexibility for those who want to change their look without long-term commitment. Clip-ins and halo extensions are popular temporary options, allowing you to add volume and length instantly. These silk-based extensions blend seamlessly with your natural hair, creating an extension invisible effect.
Permanent solutions, like tape-ins and sew-ins, provide a more lasting transformation. Bella extensions, known for their quality, are a popular choice for permanent applications. These extensions require professional installation and maintenance, including special shampoo and care routines to ensure longevity.
When deciding between temporary and permanent extensions, consider your lifestyle, budget, and desired outcome. Temporary options are ideal for special occasions or experimenting with different styles, while permanent extensions suit those seeking a consistent, long-term change. Your choice will impact your daily routine and maintenance requirements:
- Temporary extensions: Easy to apply and remove, low maintenance
- Permanent extensions: Professional installation, regular upkeep, longer-lasting results
- Semi-permanent options: Balance between flexibility and durability
Selecting the Right Color and Texture
Selecting the right color and texture for your hair extensions is crucial for achieving a natural, seamless look. When choosing remy hair extensions, consider your natural hair color and texture to ensure a perfect match. Use a color-matching tool to compare different shades and find the closest match to your own hair.
The texture of your extensions should complement your natural hair type. Whether you have straight, wavy, or curly hair, select extensions that mimic your hair’s natural movement. Remember, the price of hair extensions often reflects their quality, so invest in high-grade remy hair extensions for the most natural appearance and longevity.
Consider your desired style and maintenance routine when selecting hair extensions. If you frequently change your hairstyle, opt for versatile extensions that can be styled easily. Keep in mind that proper care and maintenance are essential for preserving the quality of your extensions, regardless of the type you choose:
- Use sulfate-free shampoos and conditioners
- Brush extensions gently with a specialized extension brush
- Avoid sleeping with wet extensions
- Schedule regular maintenance appointments with your stylist
Weighing the Pros and Cons of Each Type
When choosing hair extensions, consider the pros and cons of each type to make an informed decision. Clip-in extensions offer versatility and easy application, ideal for those who want to change their look frequently. However, they require daily removal and may not be suitable for those seeking a more permanent length increase.
Tape-in and sew-in extensions provide longer-lasting results and can be a great option if you’re looking to add significant length or volume to your hair. These methods often require professional installation and maintenance, which can impact your budget and hair care routine. Remember to factor in the cost of regular salon visits when planning your extension payment.
Synthetic extensions are typically more affordable and come in a wide range of colors, including various blond shades. However, they may not blend as naturally with your own hair and can’t be heat-styled. Human hair extensions, while pricier, offer superior quality and versatility. Consider your lifestyle, desired maintenance level, and budget when weighing your options:
- Clip-ins: Low commitment, easy to use, ideal for occasional wear
- Tape-ins: Semi-permanent, natural look, requires professional installation
- Sew-ins: Long-lasting, adds significant volume and length, higher maintenance
- Synthetic: Budget-friendly, limited styling options
- Human hair: Natural look and feel, versatile styling, higher cost
You know the types now. But which one’s right for you? Let’s find out.
Choosing the Perfect Hair Extensions for Your Needs

Selecting the right hair extensions involves considering your goals, lifestyle, and hair type. Consult a professional stylist to determine the ideal length and volume for your desired look. Avoid common mistakes by matching extensions to your natural hair and scalp health. Consider sustainable options and how extensions complement your clothing and personal brand. This guide will help you make an informed choice in the United States market.
Assessing Your Hair Goals and Lifestyle
When selecting hair extensions, consider your lifestyle and hair goals. If you desire a long-term solution, loc extensions or tape-in extensions might suit you best. These options offer durability and can withstand daily activities, including heat styling.
Assess your comfort level with maintenance and styling. Tape-in extensions require regular upkeep but provide a natural look. If you enjoy changing your style frequently, clip-in extensions offer versatility without long-term commitment.
Consider your hair type and texture when choosing extensions. For those with fine hair, lightweight options like tape-ins can add volume without causing strain. If you have thicker hair, you might opt for more robust methods like sew-ins or loc extensions. Your choice should complement your natural hair and lifestyle:
- Loc extensions: Ideal for those seeking a long-lasting, low-maintenance option
- Tape-in extensions: Suitable for regular styling and a natural look
- Clip-ins: Perfect for occasional use and style versatility
- Heat-friendly options: Essential for those who frequently use styling tools
Matching Extensions to Your Hair Type
When matching extensions to your hair type, consider both texture and thickness. If you have fine hair, opt for lightweight extensions like tape-ins or clip-ins to avoid putting stress on your natural hair. For thicker hair types, you can choose heavier options like sew-ins or fusion methods.
Your hair’s natural texture plays a crucial role in selecting the right extensions. Choose extensions that mimic your hair’s natural wave pattern or curl type for a seamless blend. If you have straight hair, you’ll find a wider range of options, but ensure the texture matches your hair’s smoothness or slight wave.
Consider your hair’s porosity when selecting extensions. High-porosity hair may require more moisturizing products, so choose extensions that can withstand frequent treatments. For low-porosity hair, opt for extensions that don’t require excessive product use to maintain their appearance and health.
Consulting With a Professional Stylist
Consulting a professional stylist is crucial when choosing hair extensions. They can assess your hair type, texture, and scalp health to recommend the most suitable options. Your stylist will consider factors like your lifestyle, desired look, and maintenance preferences to guide you toward the best extension method.
During your consultation, your stylist will examine your natural hair and discuss your goals. They’ll explain different extension types, including tape-ins, clip-ins, and sew-ins, highlighting the pros and cons of each. This personalized advice ensures you select extensions that complement your hair and meet your expectations.
Your stylist can also provide valuable insights on extension care and maintenance. They’ll offer tips on washing, styling, and preserving your extensions, helping you maximize their lifespan. By consulting a professional, you’ll gain the knowledge needed to make an informed decision and achieve the best results with your hair extensions.
Deciding on Length and Volume
When deciding on length and volume for your hair extensions, consider your natural hair length and desired outcome. For a subtle change, choose extensions that add 2-4 inches to your current length. If you’re aiming for a dramatic transformation, opt for extensions that are 6-8 inches longer than your natural hair.
Volume is equally important when selecting extensions. If you have fine hair, start with a smaller number of wefts to avoid overwhelming your natural locks. For those with thicker hair, you can add more wefts to achieve a fuller look. Remember, the key is to create a seamless blend between your natural hair and the extensions.
Consider your face shape and lifestyle when determining length and volume. Longer extensions can elongate round faces, while shorter styles can complement oval shapes. If you lead an active lifestyle, you might prefer shorter extensions that are easier to manage. Choose a length and volume that enhances your features and fits your daily routine:
Avoiding Common Selection Mistakes
Avoid selecting extensions that don’t match your natural hair color or texture. Choose extensions that blend seamlessly with your own hair to create a natural look. If you’re unsure, consult a professional stylist who can help you find the perfect match.
Don’t underestimate the importance of quality. Opting for cheap, low-quality extensions can lead to tangling, shedding, and a shorter lifespan. Invest in high-quality extensions made from real human hair for the best results and longevity.
Be realistic about the maintenance required for your chosen extension type. Consider your lifestyle and the time you can dedicate to caring for your extensions. Selecting a high-maintenance option when you have limited time can lead to disappointment and damage:
- Research different extension types and their care requirements
- Consider your daily routine and styling preferences
- Choose extensions that align with your maintenance capabilities
- Seek professional advice if unsure about the best option for you
Extensions chosen, the perfect match found. Now, money talks and budgets beckon.
Planning Your Budget for Hair Extensions

Planning your budget for hair extensions involves understanding costs, pricing factors, and comparing salon and at-home options. Consider maintenance expenses and explore ways to save money without compromising quality. This guide will help you make informed decisions about your hair extension investment, ensuring you achieve your desired look within your budget.
Understanding the Costs Involved
When budgeting for hair extensions, consider the initial cost of the extensions themselves and the installation fees. High-quality human hair extensions typically cost more than synthetic options but offer better longevity and styling versatility. Installation prices vary based on the method chosen, with clip-ins being the most budget-friendly and sew-ins or fusion methods often commanding higher fees.
Factor in ongoing maintenance costs when planning your budget. Regular touch-ups, specialized hair care products, and potential removal fees all contribute to the overall expense. You’ll need to schedule maintenance appointments every 6-8 weeks for most semi-permanent extension types, which can significantly impact your long-term budget.
Consider the lifespan of your chosen extensions when assessing cost-effectiveness. While some methods may seem pricier upfront, they often last longer, potentially offering better value over time. Evaluate your budget in terms of cost per wear to determine which option aligns best with your financial goals and desired look.
Factors That Influence Pricing
The quality of hair extensions significantly influences their price. High-grade human hair extensions, especially those made from virgin or Remy hair, command higher prices due to their superior texture, durability, and styling versatility. You’ll find that synthetic options are more affordable but may not offer the same natural look or longevity.
The method of installation also affects pricing. Clip-in extensions tend to be less expensive as they don’t require professional application. Conversely, more permanent methods like tape-ins, fusion, or micro-link extensions often come with higher installation fees due to the time and expertise required.
The length and volume of extensions you choose impact the overall cost. Longer extensions or those providing more volume typically use more hair, increasing the price. Additionally, customization options like color matching or special treatments can add to the final cost of your hair extension service.
Comparing Salon and at-Home Options
When comparing salon and at-home options for hair extensions, consider the level of expertise required. Professional stylists possess the skills to seamlessly blend extensions with your natural hair, ensuring a flawless look. At-home application may save money initially but can lead to costly corrections if not done properly.
Salon services offer a wider range of extension types and customization options. You’ll have access to high-quality human hair extensions and professional-grade application methods that may not be available for at-home use. However, DIY clip-in extensions can be a cost-effective alternative for occasional wear or those comfortable with self-application.
Time investment differs significantly between salon and at-home options. Professional installation typically takes several hours but guarantees a polished result. At-home application of clip-ins is quicker but may require practice to achieve a natural look. Weigh the time commitment against your budget and desired outcome when choosing between salon and DIY methods.
Maintenance Expenses to Consider
When budgeting for hair extensions, factor in ongoing maintenance costs. You’ll need specialized shampoos, conditioners, and brushes designed for extensions to keep them looking their best. These products often cost more than regular hair care items, so allocate funds accordingly in your budget.
Consider the frequency of salon visits for touch-ups and adjustments. Most semi-permanent extensions require maintenance every 6-8 weeks, which can add up over time. Include these appointment costs in your long-term budget to avoid unexpected expenses.
Don’t forget about potential removal fees if you decide to change your style or take a break from extensions. Some methods, like tape-ins or sew-ins, require professional removal to prevent damage to your natural hair. Account for these costs to ensure a comprehensive budget for your hair extension journey.
Saving Money Without Sacrificing Quality
To save money without sacrificing quality, consider purchasing high-grade clip-in extensions. These allow you to achieve a luxurious look for special occasions without the ongoing costs of permanent extensions. Invest in a set of human hair clip-ins, which you can reuse multiple times with proper care.
Explore bundle deals or package offers from reputable salons. Many establishments provide discounted rates for combining extension installation with coloring or styling services. This approach can help you achieve a comprehensive hair transformation while reducing overall costs.
Learn to maintain your extensions properly to extend their lifespan. By mastering basic care techniques, you’ll minimize the need for frequent professional maintenance. Invest time in learning proper brushing, washing, and storage methods to keep your extensions in top condition longer:
Money set. Time for action. The chair awaits.
What to Expect During the Installation Process

Understanding the installation process for hair extensions helps you prepare and set expectations. Learn how to ready your hair, what happens during installation, time commitments for different methods, immediate aftercare, and follow-up appointments. This knowledge ensures a smooth experience and optimal results for your new extensions.
Preparing Your Hair for Extensions
Before your extension installation, wash your hair with a clarifying shampoo to remove any buildup. Avoid using conditioner or styling products, as these can interfere with the adhesive or attachment method. This clean slate ensures your extensions bond securely and blend seamlessly with your natural hair.
Trim your hair if needed to create an even base for the extensions. If you have layers, consider growing them out slightly to help conceal the attachment points. Your stylist may recommend specific cuts or styles that work best with your chosen extension type, ensuring a natural-looking result.
Brush your hair thoroughly to remove any tangles or knots. This step is crucial for smooth installation, especially for methods like tape-ins or sew-ins. If you have textured hair, consider having it straightened or blown out before the appointment to facilitate easier application and blending of the extensions.
Step-by-Step Installation Overview
Your extension installation begins with a consultation to confirm your desired look and placement. The stylist sections your hair, preparing it for the chosen method. For tape-ins, they’ll apply adhesive strips, while sew-ins involve creating a cornrow base.
Next, the stylist attaches the extensions, carefully blending them with your natural hair. This process requires precision to ensure a seamless, natural-looking result. They’ll work in sections, moving from the nape of your neck upward, adjusting the placement for optimal coverage and movement.
Once all extensions are in place, your stylist will trim and style your hair to blend the new length and volume seamlessly. They’ll teach you how to care for your extensions, including proper brushing techniques and product recommendations. The installation process typically follows these steps:
- Hair sectioning and preparation
- Application of extensions (method-specific)
- Blending and styling
- Final adjustments and care instructions
Time Commitment for Different Methods
The time commitment for hair extension installation varies depending on the method you choose. Clip-in extensions are the quickest option, taking just 15-30 minutes to apply at home. You can easily incorporate these into your routine for special occasions or daily wear.
Tape-in extensions require a more substantial time investment, typically ranging from 1-2 hours for a full head application. This method offers a semi-permanent solution that lasts 6-8 weeks. The installation process involves carefully placing pre-taped wefts close to your scalp for a natural look.
Sew-in or fusion methods demand the most time, often taking 3-6 hours for complete installation. These techniques provide long-lasting results but require significant patience during the appointment. Your stylist will meticulously attach each extension to ensure a seamless blend with your natural hair. Consider the following time estimates for various extension methods:
- Clip-ins: 15-30 minutes (DIY)
- Tape-ins: 1-2 hours
- Sew-ins: 3-6 hours
- Fusion: 3-6 hours
- Micro-links: 2-4 hours
Immediate Aftercare Procedures
After your hair extension installation, avoid washing your hair for at least 48 hours. This allows the bonds or attachments to set properly, ensuring a secure hold. During this time, sleep with your hair in a loose braid or ponytail to prevent tangling and minimize friction against your pillow.
Be gentle when brushing your newly installed extensions. Start from the ends and work your way up, using a soft-bristled brush designed for extensions. Avoid tugging or pulling on the bonds, as this can cause damage or premature shedding. Brush your hair several times a day to prevent matting and maintain a smooth appearance.
Adjust your styling routine to accommodate your new extensions. Use heat protectant products before styling with hot tools, and avoid applying heat directly to the bonds or attachment points. When using hair ties, opt for soft, seamless options to prevent breakage and maintain the integrity of your extensions.
Scheduling Follow-Up Appointments
Schedule your first follow-up appointment 2-3 weeks after your extension installation. This allows your stylist to check the bonds, adjust any loose pieces, and address any concerns you may have. Regular follow-ups ensure your extensions remain secure and blend seamlessly with your natural hair.
Plan for maintenance appointments every 6-8 weeks, depending on your extension type and hair growth. During these visits, your stylist will move up tape-in extensions, tighten sew-ins, or replace any shed strands. Consistent maintenance prolongs the life of your extensions and keeps them looking fresh.
Book your appointments in advance to secure preferred time slots. Many salons offer reminder services or online booking systems to help you stay on track with your extension care. Prioritizing these follow-ups prevents potential issues and maintains the health of both your natural hair and extensions.
The installation process complete, your new look awaits. Now, let’s ensure your extensions stay beautiful for months to come.
Maintaining and Caring for Your Hair Extensions
Proper maintenance is crucial for keeping your hair extensions looking beautiful and lasting longer. Learn daily care routines, discover recommended products, and master safe washing and drying techniques. Explore styling tips to extend longevity and learn to recognize signs of wear. This guide will help you maintain your extensions effectively, ensuring they remain a valuable investment in your appearance.
Daily Care Routines to Follow
Brush your extensions gently twice daily using a soft-bristled brush designed for extensions. Start at the ends and work your way up to prevent tugging on the bonds. This routine helps maintain smoothness and prevents tangling, ensuring your extensions stay in top condition.
Before bed, secure your extensions in a loose braid or low ponytail to minimize friction and tangling while you sleep. Use a silk or satin pillowcase to reduce friction further, helping your extensions maintain their quality and appearance for longer.
Apply a leave-in conditioner or hair oil to the mid-lengths and ends of your extensions daily, avoiding the roots and attachment points. This practice keeps your extensions moisturized and prevents dryness or brittleness, extending their lifespan and maintaining a natural, healthy look.
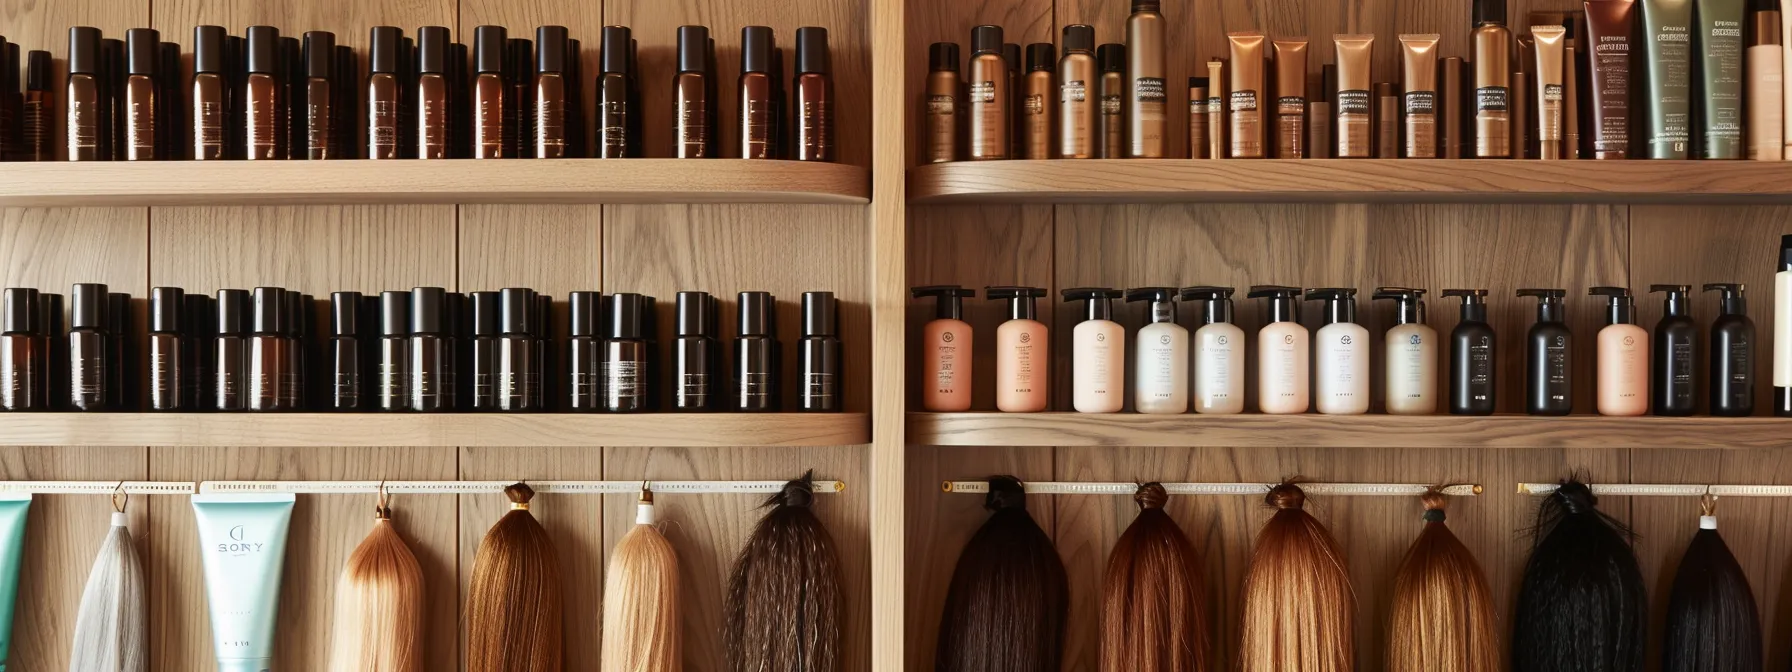
Recommended Haircare Products
Choose sulfate-free shampoos and conditioners specifically formulated for hair extensions. These products are gentler on the bonds and help maintain the extension’s integrity. Look for brands that offer extension-safe formulations to ensure your investment stays in top condition.
Invest in a high-quality leave-in conditioner to keep your extensions hydrated and tangle-free. Apply it from mid-length to ends, avoiding the roots to prevent loosening of the bonds. This step is crucial for maintaining the softness and manageability of your extensions.
Use a heat protectant spray before styling with hot tools to shield your extensions from damage. Opt for lightweight formulas that won’t weigh down your hair or cause buildup. When selecting styling products, choose those labeled as extension-friendly to avoid any adverse effects on the bonds or wefts. Here’s a list of essential products for your extension care routine:
- Sulfate-free shampoo and conditioner
- Leave-in conditioner
- Heat protectant spray
- Extension-safe styling products
- Soft-bristled brush designed for extensions
Safely Washing and Drying Extensions
When washing your hair extensions, use lukewarm water and apply shampoo gently, focusing on your scalp and roots. Avoid rubbing or tangling the extensions. Rinse thoroughly, ensuring no product residue remains, as this can lead to buildup and dullness.
Apply conditioner from mid-length to ends, carefully detangling with your fingers or a wide-tooth comb. Rinse with cool water to seal the hair cuticles and enhance shine. Pat your hair gently with a microfiber towel to remove excess water, avoiding rubbing which can cause frizz and tangling.
Allow your extensions to air dry whenever possible. If you must use a blow dryer, apply a heat protectant and use the lowest heat setting. Direct the airflow downward along the hair shaft to minimize frizz and maintain smoothness. Finish with a cool shot to set your style and add extra shine to your extensions.
Styling Tips to Extend Longevity
Minimize heat styling to extend the life of your extensions. When you do use hot tools, apply a heat protectant and keep the temperature below 350°F. Opt for heatless styling methods like overnight braids or foam rollers to achieve waves or curls without damaging your extensions.
Avoid tight hairstyles that can strain your extensions and natural hair. Choose loose ponytails or braids when tying your hair back, and use soft, snag-free hair ties. This approach reduces stress on the bonds and prevents premature shedding of your extensions.
Protect your extensions while sleeping by using a silk or satin pillowcase. This reduces friction and helps maintain the smoothness of your extensions. Before bed, gently brush your hair and secure it in a loose braid to prevent tangling and matting overnight, ensuring your extensions stay in top condition for longer.
Recognizing Signs of Wear and Tear
Pay attention to excessive shedding or tangling of your extensions, as these are early signs of wear. If you notice more hair than usual falling out during brushing or washing, it’s time to consult your stylist. Tangling at the roots often indicates that the extensions need adjustment or replacement.
Watch for changes in texture or appearance of your extensions. If they become excessively dry, brittle, or lose their natural shine, it’s a sign that they’re reaching the end of their lifespan. You may need to adjust your care routine or consider replacing the extensions to maintain a fresh, natural look.
Monitor the attachment points of your extensions regularly. For tape-ins, check if the bonds are becoming visible or loose. With sew-ins, feel for any discomfort or loosening at the braids. If you experience any irritation or notice your natural hair being pulled, schedule an appointment with your stylist immediately to prevent damage.
The sun set on your hair care routine. Night fell, and it was time for change.
Safely Removing and Reapplying Extensions
Safely removing and reapplying hair extensions is crucial for maintaining your natural hair’s health. Learn when to remove extensions, compare professional and DIY methods, and discover techniques to prevent damage. Understand how to care for your natural hair post-removal and prepare for your next installation. This guide ensures a smooth transition between extension applications, preserving your hair’s integrity.
Determining the Right Time for Removal
You’ll know it’s time to remove your extensions when you notice significant regrowth at the roots, typically about 6-8 weeks after installation. This varies depending on your hair growth rate and the type of extensions you have. Pay attention to any discomfort or tension on your scalp, as this indicates your extensions need adjustment or removal.
If you observe excessive tangling, matting, or difficulty managing your extensions, it’s a sign they should be removed. Extensions that have lost their luster or become brittle are past their prime and should be taken out to prevent damage to your natural hair. Regular check-ins with your stylist can help you determine the optimal removal time.
Consider your upcoming events or lifestyle changes when planning extension removal. If you have a special occasion or vacation approaching, you might want to time the removal to align with these plans. Remember, giving your natural hair a break between extension applications is crucial for maintaining its health and strength.
Professional Removal vs. DIY Methods
Professional removal of hair extensions is the safest option, especially for semi-permanent methods like tape-ins or fusion extensions. Stylists use specialized tools and techniques to minimize damage to your natural hair. They can also assess the condition of your scalp and hair, providing valuable advice for future extension applications.
DIY removal might seem cost-effective, but it carries risks of hair damage and incomplete removal. If you choose this route, research thoroughly and use appropriate products designed for extension removal. For clip-ins, you can safely remove them at home, but more permanent types require careful consideration before attempting self-removal.
Consider the type of extensions you have when deciding between professional and DIY removal. Here’s a comparison to help you make an informed decision:
Steps to Prevent Damage During Removal
Before removing your extensions, gently detangle your hair using a wide-tooth comb or extension brush. Start from the ends and work your way up to minimize stress on the bonds. Apply a leave-in conditioner to help soften the hair and reduce friction during the removal process.
Use the appropriate removal solution for your extension type. For tape-ins, apply a bond remover to dissolve the adhesive gently. With fusion extensions, use a keratin remover and work in small sections. Never force or pull the extensions, as this can damage your natural hair.
After removal, cleanse your scalp thoroughly with a clarifying shampoo to remove any residue. Follow with a deep conditioning treatment to nourish your natural hair. Give your hair a break between installations, allowing it to recover and regain strength before applying new extensions.
Caring for Your Natural Hair Post-Removal
After removing your extensions, focus on nourishing your natural hair with deep conditioning treatments. Apply a protein-rich mask weekly to strengthen your strands and repair any damage. Avoid heat styling for at least two weeks to give your hair time to recover and regain its natural elasticity.
Trim your hair to remove any split ends or damaged sections caused by the extensions. This fresh start promotes healthy hair growth and prevents further breakage. Consider incorporating scalp massages into your routine to stimulate blood flow and encourage hair growth.
Adjust your hair care routine to address your natural hair’s specific needs post-extension removal. Use gentle, sulfate-free shampoos and lightweight conditioners to avoid weighing down your hair. Introduce leave-in treatments and hair oils to maintain moisture balance and protect your strands. Here’s a suggested post-removal hair care schedule:
Preparing for Your Next Installation
Before your next extension installation, give your natural hair time to recover. Allow at least 2-3 weeks between removals and new applications to ensure your scalp and hair regain strength. During this period, focus on deep conditioning treatments and gentle hair care to prepare your locks for the next set of extensions.
Schedule a consultation with your stylist to assess your hair’s condition and discuss your desired look. They’ll recommend the most suitable extension type based on your hair’s current state and your lifestyle needs. This consultation also allows you to address any concerns from your previous installation and make informed decisions about your next set of extensions.
Prepare your hair for the upcoming installation by trimming any split ends and clarifying your scalp. Use a gentle clarifying shampoo to remove any product buildup, ensuring a clean base for the new extensions. Avoid applying heavy oils or leave-in products in the days leading up to your appointment, as these can interfere with the bonding process of certain extension types.